The first steps to create reservations and blocks are practically the same, and you can do it from the option “New Reservation” or “Property Calendar.”
In "New Reservation," you see all available properties according to the filters selected.
In "Property Calendar," you select a specific property and see the available dates, details of reservations and blocks already made, prices, etc.
Find below instructions for both options.
To create a reservation through "New Reservation,” go to MENU > BOOKING > NEW RESERVATION. Note the tabs “client” (a guest booking) and “Homeowner” (an owner booking their own stay or someone else's stay) and select the correct option.
Click on the “Check-in” field to open the calendar, click on the check-in date and drag to the check-out date. Select the integrator, click "Filter,” and scroll down to see the available properties.
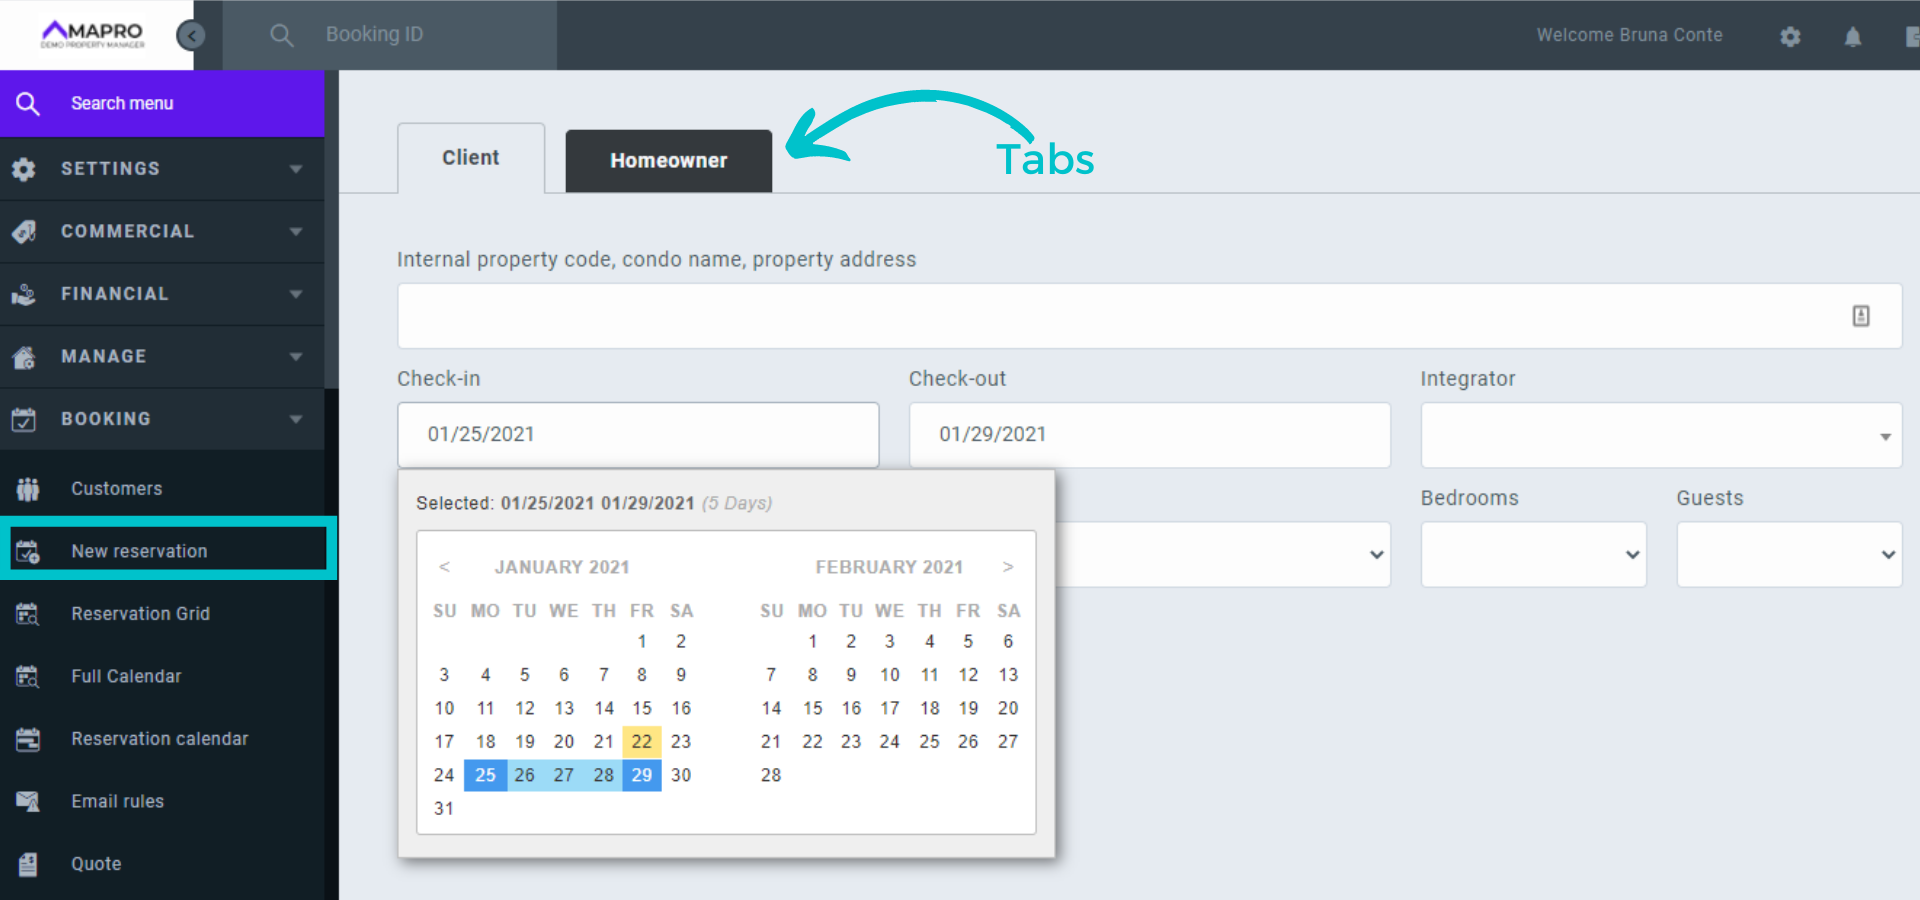
Check the list of available properties for the number of rooms, photos, rates, etc., and click "Book” to the right of the house you chose.

On this new screen, you will be able to add the following information:
- Codes and passwords to access the property
- Change the property (it can be done in the reservations grid as well, by dragging from one property to the other, as long as the dates remain the same)
- Change the dates
- Change the time and add blocks for early check-in or late check-out
- Define whether it is a guest reservation, an owner reservation, or an owner stay
- Integrator booking code
- Link to guest generate the instant codes and access the property (if there are any)
- Guest information such as name, address, telephone, etc. Under "Language," select the language in which the guest prefers to view the information
- Add other guests
- Add extra services such as cleaning, park tickets, etc.
- Payment
After entering all data about the guest and the reservation, click "Finalize reservation."
Important: At the bottom of the screen, there is the option to "Save" the changes in the reservation and to "Close the reservation" - the closing is usually done by the financial team, after the guest checks-out, and when there are no more changes to be made, once the data will be informed on the owner's statement.
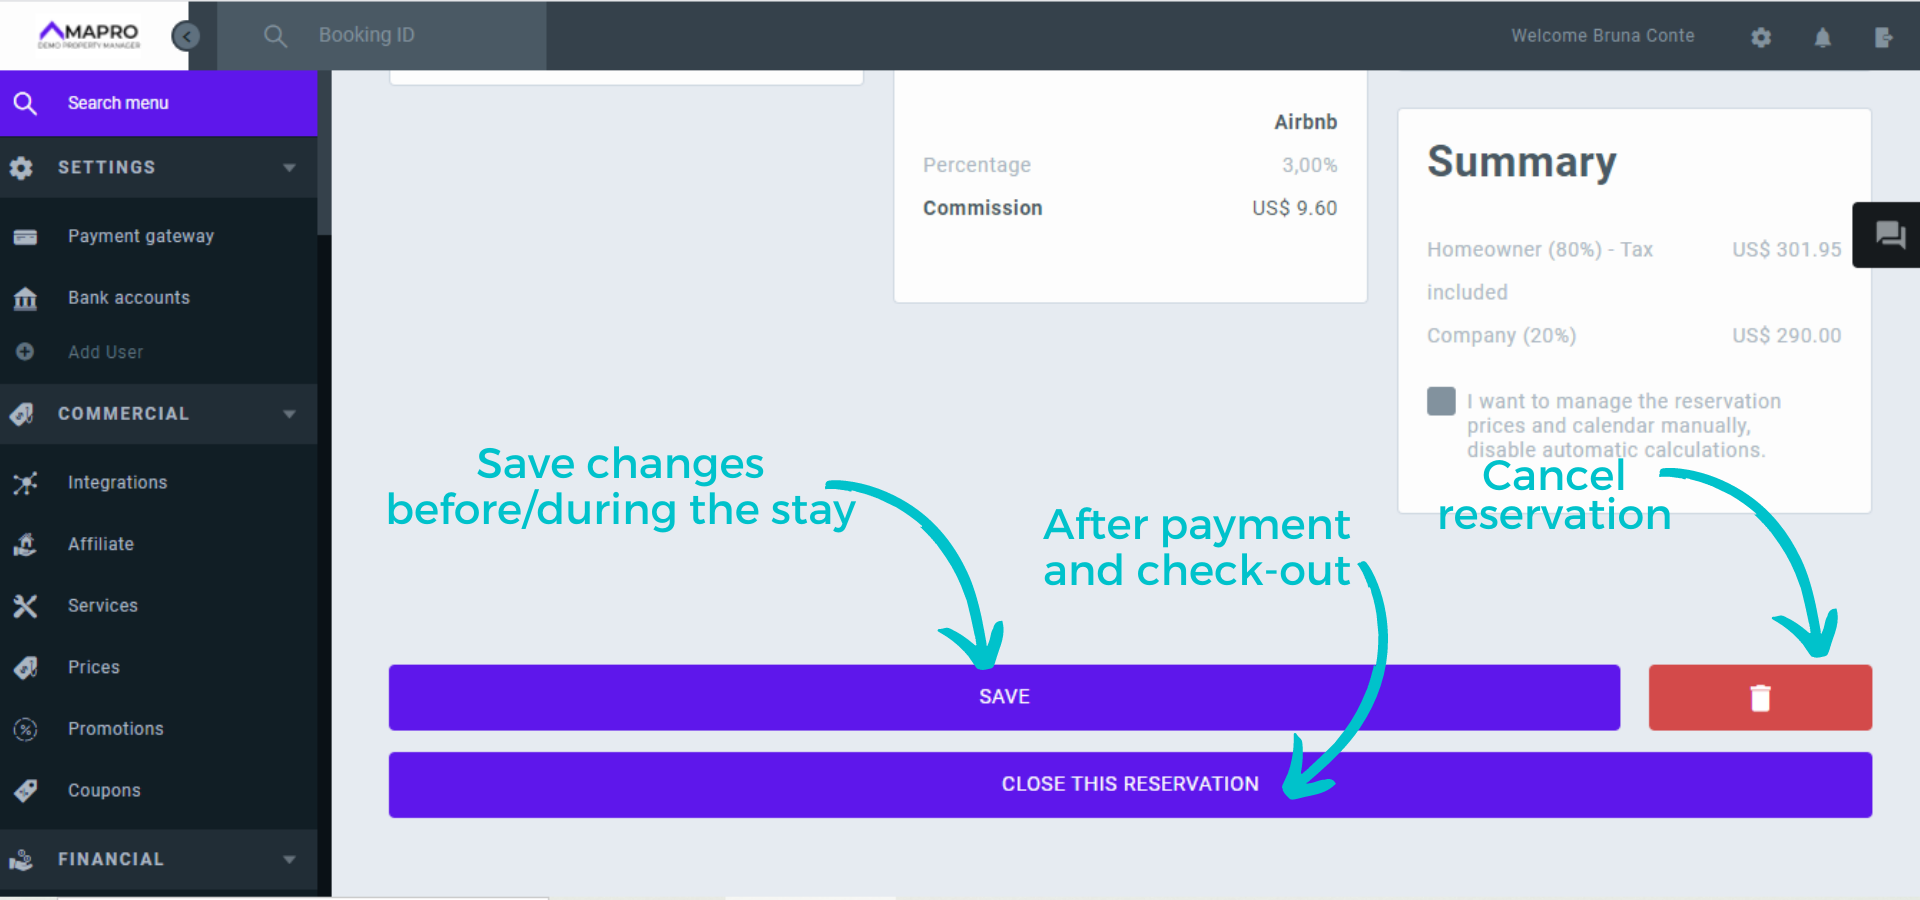
Learn more about "How to close a reservation"
Reservation from the Full Calendar
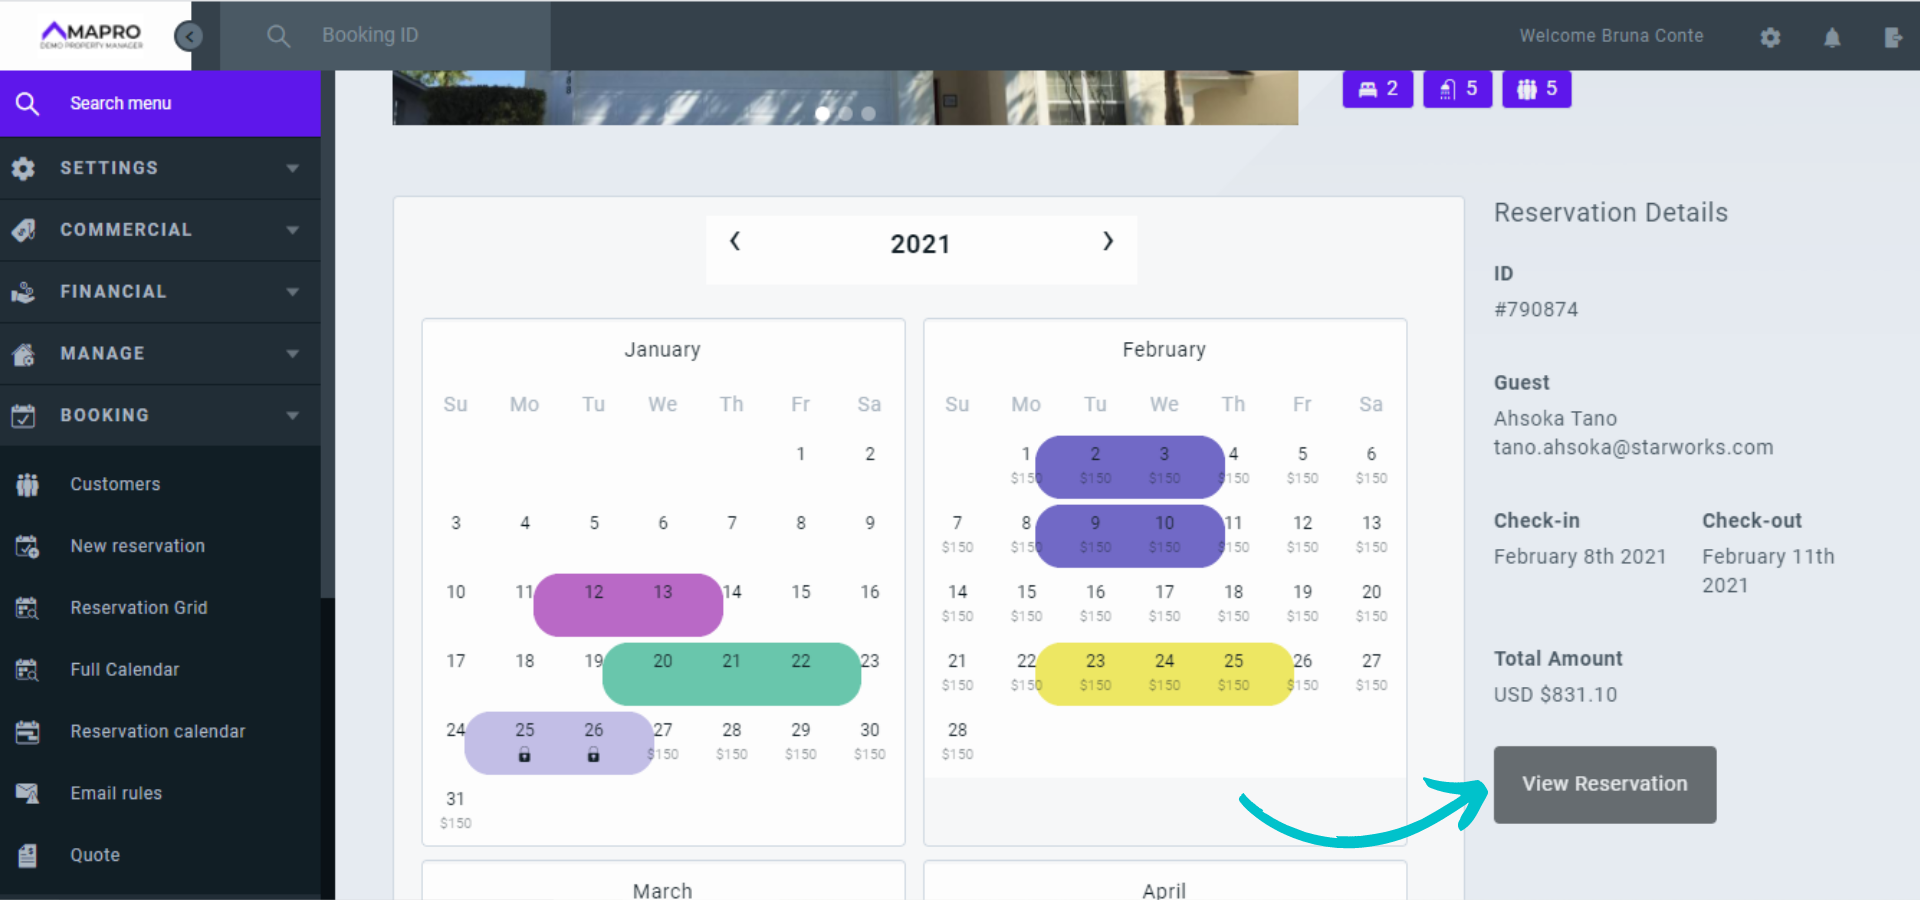
To create a reservation from the Property Calendar, go to MENU > BOOKING > FULL CALENDAR and choose the property on the right.
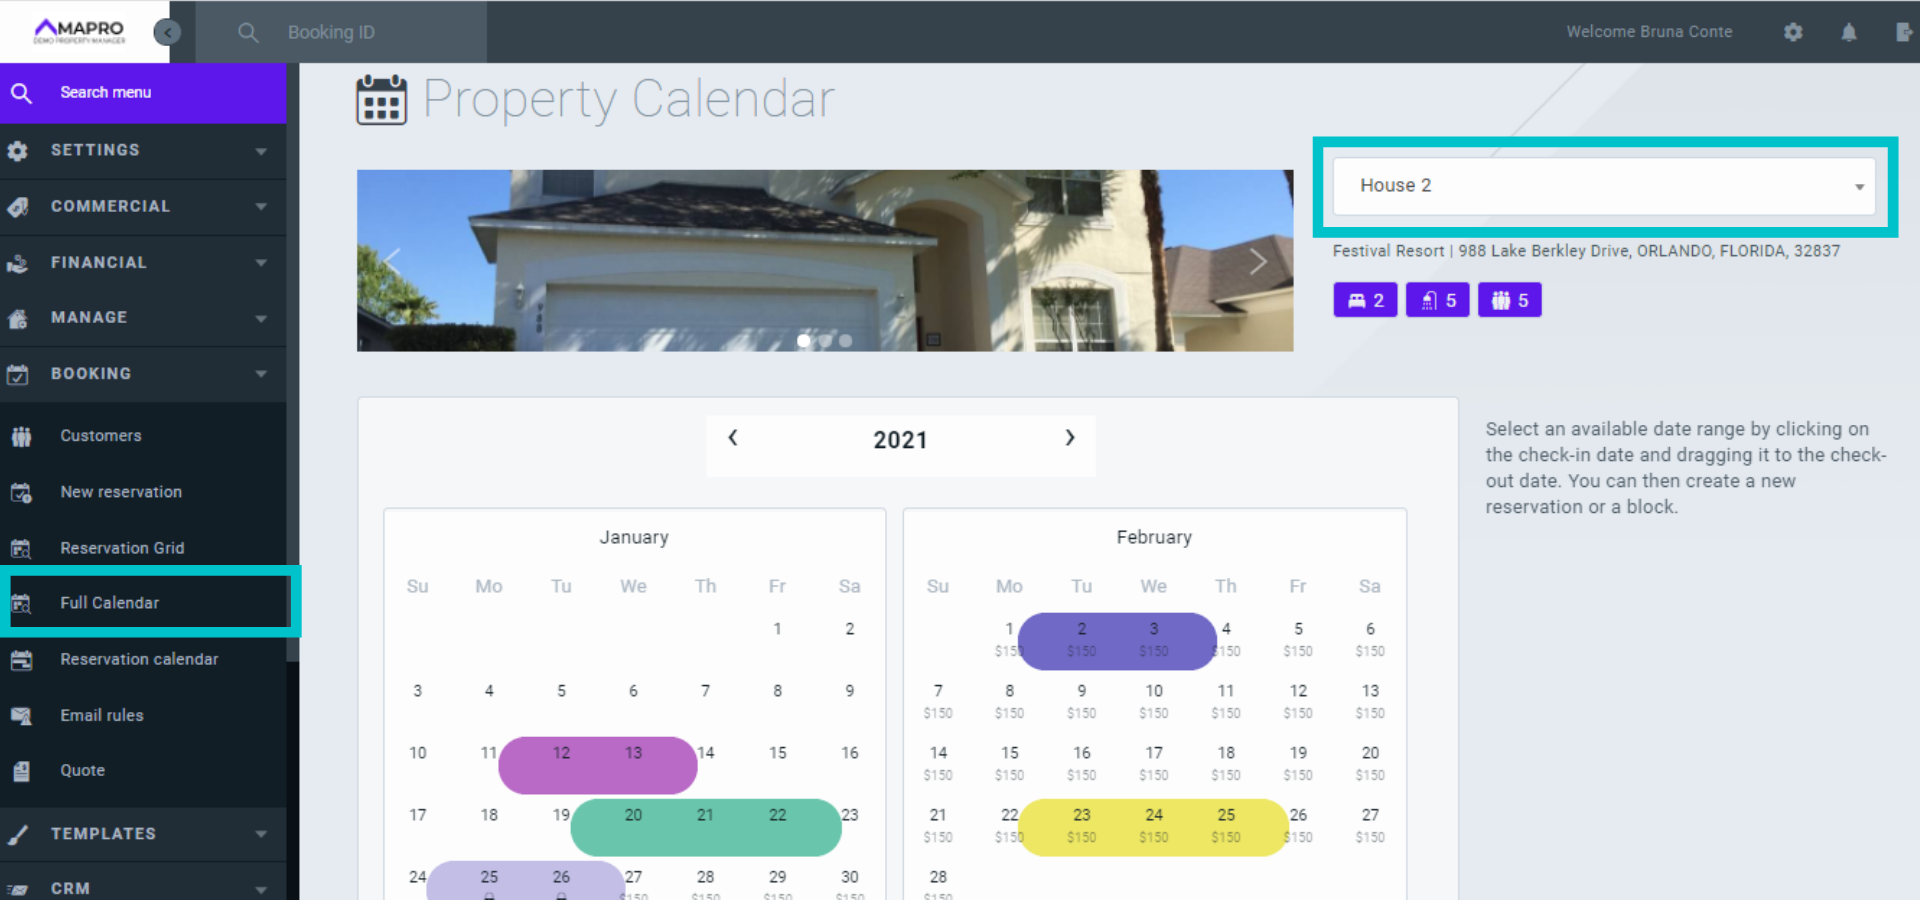
When you select the property, the full calendar of the property is displayed on the screen.
The dates already booked are marked with the color of the integrator that made the reservation. You can hover over the reservation to see details, as well as check the integrator’s colors in the caption at the bottom of the page.
Dates marked in gray are blocked.
Blank dates are available, and the rate for each night appears just below. Click on the check-in date, and drag to the check-out date. A new window will open on the right for you to complete with the reservation information.
After entering all data, scroll down to save.
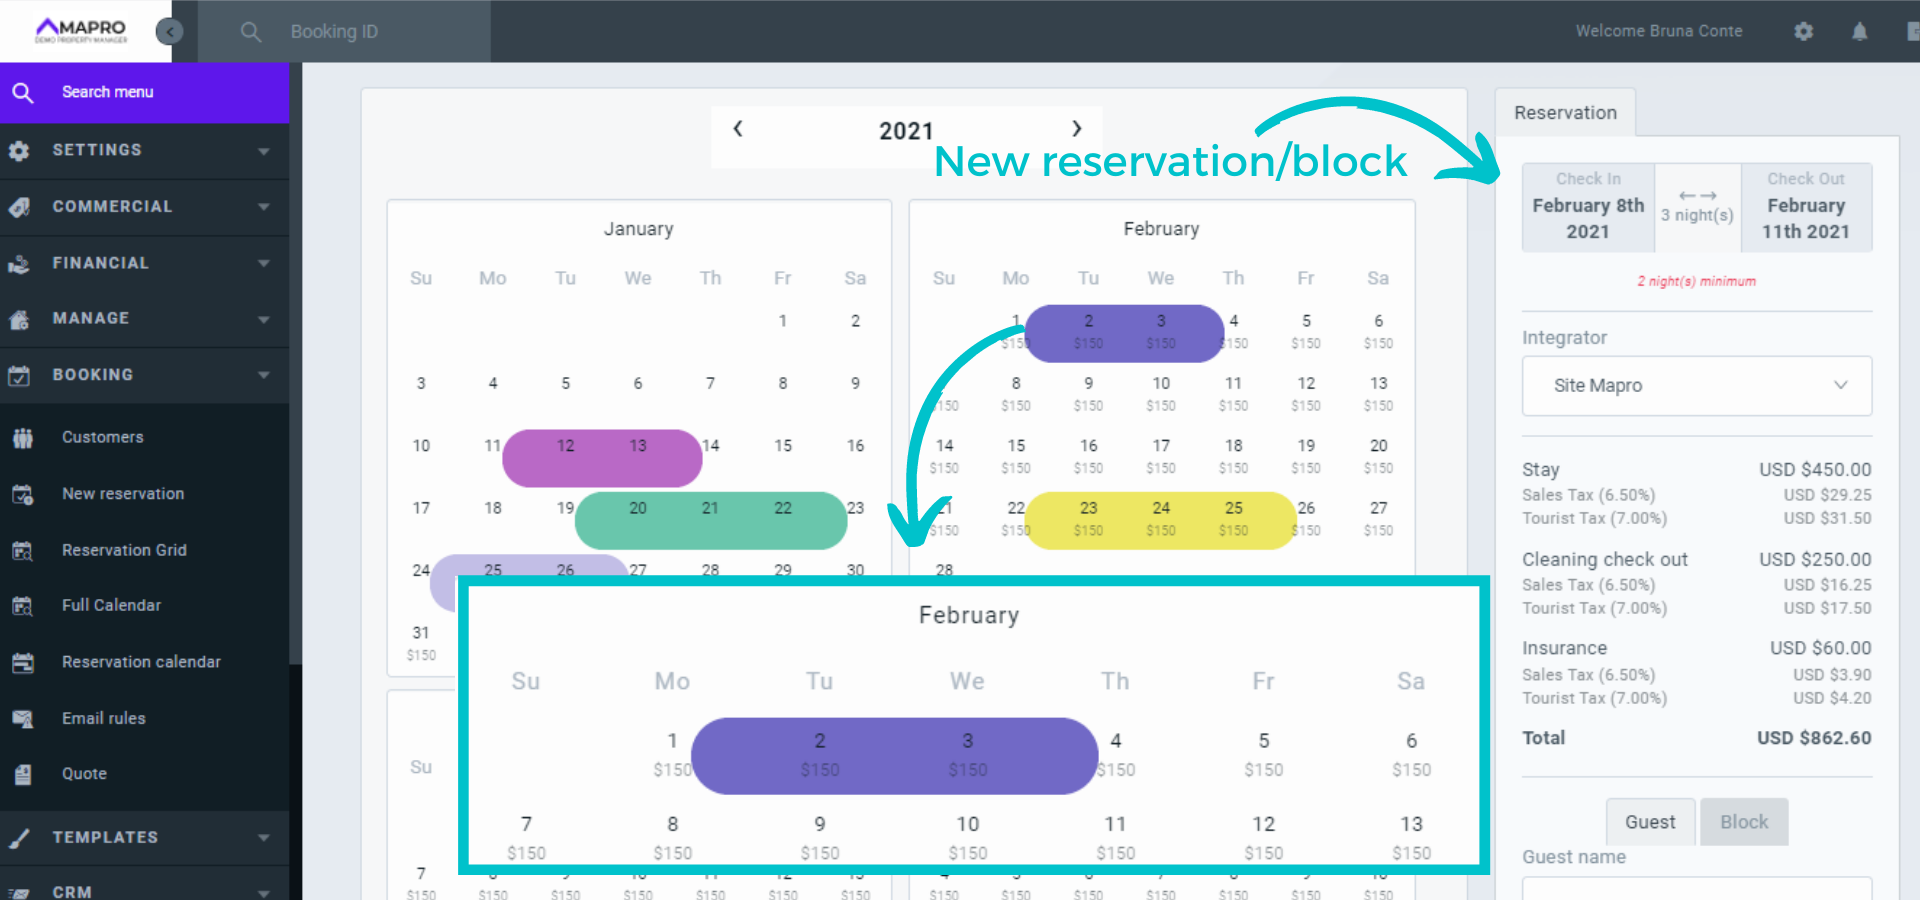
Important: To create the reservation, it is necessary to click on "guest" and add name and e-mail. If you choose to block, you do not need to enter other data.
After booking, click "View booking" to enter the details.
When you open the reservation, you will be able to view/edit/add the following information:
- Codes and passwords to access the property
- Change the property (it can be done in the reservations grid as well, by dragging from one property to the other, as long as the dates remain the same)
- Change the dates
- Change the time and add blocks for early check-in or late check-out
- Define whether it is a guest reservation, an owner reservation, or an owner stay
- Integrator booking code
- Link to the guest generate the instant codes and access the property (if there are any)
- Guest information such as name, address, telephone, etc. Under "Language," select the language in which the guest prefers to view the information
- Add other guests
- Add extra services such as cleaning, park tickets, etc.
- Payment
After entering all data about the guest and the reservation, click "Finalize reservation."
Important: At the bottom of the screen, there is the option to "Save" the changes in the reservation and to "Close the reservation" - the closing is usually done by the financial team, after the guest checks-out, and when there are no more changes to be made, once the data will be informed on the owner's statement.

Learn more: